How to clean your Weber or Ziggy BBQ grills while caravanning

Introduction to Cleaning Weber Q and Baby Q Grills
Why Cleaning Matters
Cleaning your Weber Q and Baby Q grills is an essential part of maintaining their performance and longevity. Proper cleaning ensures that your grills remain in optimal condition, free from grease build-up and potential fire hazards.
Tools and Products for Cleaning
Cleaning the Weber Q grills is similar to cleaning other appliances, but with specific considerations such as removing grill tubes and using specialized Weber cleaning kits. These tools make the process more convenient and effective.
Cleaning Methods for Weber Q Grills
Cleaning While Hot
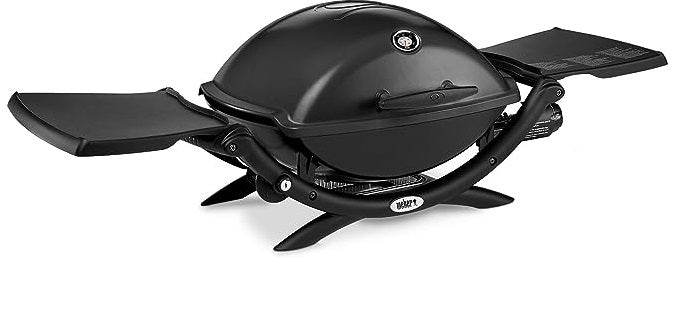
The best way to clean a Weber Q is to follow methods that ensure the durability and sustainability of your Weber Q electric and Weber Q gas grill. You can clean the grill even while it's still hot from the cooking process, or after preheating the barbecue for 10 minutes.
Using the Weber Grill Brush
When cleaning the Weber Q Pulse electric grill and Weber Q gas grill, the Weber grill brush is a great tool. It can reach into many crevices and crannies of the grill itself, removing all food debris.
Washing and Soaking
Do not wash your grill with water every time after cooking. Instead, you can wash it with hot water and detergent after prolonged use.
Hot Water and Detergent
Hot water and detergent are effective in removing grease and other residues. Immersing the grill in hot water for ten to fifteen minutes is a very effective strategy.
Special Considerations for Different Parts
Cleaning the Lid
When cleaning the lid, use a non-caustic cleaning product like the Weber Q Cleaner. Regular maintenance of the lid is essential to prevent fire hazards.
Grease and Muck Build-Up
If you notice grease and muck building up inside the bowl, you could purchase the Weber Q Cook box Scraper. Using an aluminium drip tray is recommended for collecting food residue.
Cleaning the Burner Tubes
Clean your burner tubes ideally after five or six uses. The Weber Q Grill Maintenance Kit can make this process easier.
Cleaning Weber Porcelain Grill Grates
Porcelain grill grates are a popular feature in many Weber grills, known for their non-stick properties and ease of cleaning. However, they can be susceptible to damage if not cleaned properly. Here's a comprehensive guide to cleaning Weber porcelain grill grates, ensuring they remain in top condition.
Understanding Porcelain Grill Grates
Porcelain grill grates are coated with a smooth, glass-like material that provides a non-stick surface. This coating can be delicate, so it's essential to use the right tools and techniques to clean them without causing damage.
Step-by-Step Guide to Cleaning Porcelain Grill Grates
Step 1: Pre-Cleaning Inspection
Before cleaning, inspect the grates for any significant food residue or damage. This will help you determine the level of cleaning required.
Step 2: Remove Loose Debris
Use a soft bristle or nylon grill brush to gently remove any loose food particles. Avoid using metal or wire brushes, as they can scratch the porcelain coating.
Step 3: Soak if Necessary
If the grates are heavily soiled, soak them in warm, soapy water for 15-20 minutes. This will help loosen any stubborn residue.
Step 4: Gentle Scrubbing
After soaking, use a soft bristle brush to scrub the grates gently. Focus on areas with stubborn stains, applying minimal pressure to avoid damaging the porcelain.
Step 5: Rinse and Dry
Rinse the grates thoroughly with warm water to remove any soap residue. Pat them dry with a soft cloth, ensuring no moisture remains.
Step 6: Seasoning Porcelain Grill Grates
Seasoning the porcelain grill grates is an optional but beneficial step that can enhance the non-stick properties and protect the porcelain coating. Here's how to do it properly:
6.1 Choose the Right Oil
Select a cooking oil with a high smoke point, such as canola oil, vegetable oil, or grapeseed oil. These oils are less likely to create a sticky residue and are more effective in creating a non-stick surface.
6.2 Preheat the Grill
Before applying the oil, preheat the grill to medium heat. This will open up the pores of the porcelain, allowing the oil to penetrate and adhere better.
6.3 Apply the Oil
Dip a soft cloth or paper towel in the chosen oil, and then lightly coat the grates. Be sure to cover the entire surface evenly. A grill brush with soft bristles can also be used for this purpose.
6.4 Heat the Grates
Close the grill lid and allow the grates to heat for about 10-15 minutes. This will help the oil to bond with the porcelain, creating a protective and non-stick layer.
6.5 Cool Down and Store
Turn off the grill and allow the grates to cool down naturally. Once cooled, the grates are ready for use or storage. Regular seasoning after cleaning can prolong the life of the grates and enhance your cooking experience.
6.6 Note on Frequency
Seasoning doesn't need to be done after every cleaning. Depending on the frequency of use and the types of food cooked, seasoning the grates once a month or every few months may be sufficient.




Leave a comment (all fields required)