


Most people buy a Starlink Mini, put it on the back seat, and discover the same three problems in the first week. The dish slides around. It needs power the vehicle does not naturally provide. And every time you move camp, you are carrying a dish, a cable and a power brick loose in your hands.
That is not a connectivity problem. It is a kit problem.
The Outcamp Explorer Bundle Pack solves all three in one box: a mount, a 12V power supply and a padded carry bag, priced at $290 against $320 if you buy the parts separately. What makes it the most versatile starter kit in the range is not the number of parts. It is that the mount gives you two completely different ways to fit the dish, and you can switch between them without buying anything else.
What is in the Explorer Bundle Pack
Three components, each doing one job properly.
| Component | What it does | Note |
|---|---|---|
| Universal Flat Mount | Holds the Starlink Mini. Black aluminium frame with a protective acrylic cover that shields the dish from rain, dust and wind. | Runs on magnetic feet, or bolts down once the feet are removed. |
| 12V power supply | Converts your vehicle's 12V battery to the voltage the Starlink Mini needs. | Choose Anderson plug or cigarette lighter at checkout. |
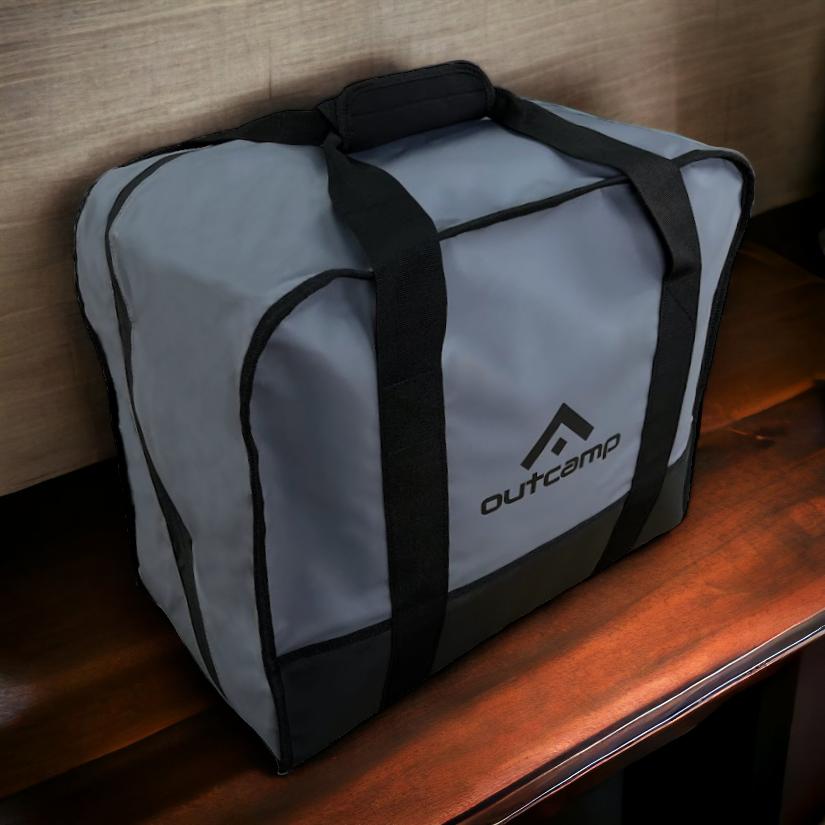
| Padded carry bag | Purpose-built messenger bag with compartments for the dish, mount, power supply, cables and adapters. | Keeps the kit together and protected in transit. |
The bundle ships with a Starlink Mini dish sold separately. It is a mounting and power kit, not a dish. That distinction matters if you are pricing a new setup from scratch.
One mount, two ways to fit it
Most mounts commit you to a method before you have owned the vehicle for a year. A roof rack mount needs rails and hardware. A magnet-only mount is fast until you want something more permanent. The Universal Flat Mount at the centre of this bundle does both, because the magnetic rubber feet come off.
Magnetic, for when the vehicle changes
High-strength magnets are set into rubber feet around the frame. Set the mount down on any flat steel surface - a vehicle roof, canopy top, toolbox lid or tray - and it holds without drilling, bolts or tools. Lift it off when you move on.
This is the mode that suits touring. You arrive, put the mount on the roof, connect power, and you are running. The next morning the whole kit goes back in the bag and the vehicle is a normal vehicle again, with nothing bolted to it and nothing left behind to rattle.
Bolted, for vehicles that stay kitted
Remove the magnetic rubber feet and the aluminium frame bolts straight down to a roof rack, toolbox, canopy or tray using standard tools. Bolted mounting is what you want on a vehicle that carries the dish permanently - a work ute, a service vehicle, or a touring rig that stays loaded between trips.
The reason is vibration. Corrugated roads, gravel and constant load work at fixings over time. A bolted frame is a fixed connection. Magnetic feet are a removable one, which is exactly what you want on a vehicle that changes roles and exactly what you do not want on one that never does.
Which mode fits your week
| If your week looks like this | Use | Why |
|---|---|---|
| Work vehicle Monday to Friday, camping on weekends | Magnetic | The mount comes off so the vehicle goes back to work clean |
| One ute, one setup, loaded all season | Bolted | Fixed connection that does not move under corrugations |
| Caravan plus tow vehicle | Either | Move the mount between the two as needed, or bolt it to one |
| Hiring or borrowing vehicles | Magnetic | No drilling, nothing to undo when you hand the keys back |
| Tradie with a steel tray and loose gear | Bolted | One less thing to pack and unpack each day |
The switch is reversible. Bolted today does not mean bolted forever, because the feet go back on.
Choosing your power connection
The bundle comes in two variants, and the only difference is the plug on the power supply. Both cost the same, and you pick one at checkout.
Anderson plug
The 12V to 30V power supply with Anderson plug connects to most 4WD auxiliary battery systems, which is the typical setup on a dual-battery tourer, a camper trailer or a vehicle with a dedicated accessory circuit. If you already run an Anderson outlet in the tub or on the rear bar, this is the variant that plugs straight in.
Cigarette lighter plug
The 12V to 36V car power supply suits vehicles with no auxiliary wiring at all. It uses the socket every vehicle already has, which makes it the simpler choice for a first setup, a hire car or a second vehicle that is not wired for accessories.
Neither choice is permanent. Both power supplies are sold separately, so if you move from a single battery to a dual-battery system later, you add the other supply rather than replacing the mount or the bag. That is part of what makes this a starter kit rather than a single-use bundle.
The bag does more work than it looks
The third part of the bundle is the one buyers think about least and use every single day. The padded carry bag is a messenger-style bag with dedicated compartments for the dish, the mount, the power supply and the cables and adapters that go with them.
The practical value is that the kit stops being four loose items. A dish under one arm, a mount in the other hand and a power lead in a pocket is how gear gets left at a campsite or scratched in a tray. A bag with a place for each part means the whole setup travels as one object, and you can tell at a glance whether it is all there.
It also means the Explorer Bundle stays a single unit when you are not using it, which matters for anyone who shares a vehicle between work and weekends.
How it compares to the alternatives
Versatility is a word that gets used loosely, so it is worth being specific about what this kit does and does not replace in the range.
Against a fixed roof mount
A permanent roof mount is the right answer for a vehicle that will carry the dish for years. It is also a commitment: hardware, holes or rails, and a mount that stays on the vehicle whether the dish is there or not. The Explorer Bundle gives you the same bolted option when you want it, and a removable option when you do not.
Against a dedicated magnetic mount
The MagLock Pro is a purpose-built magnetic mount and a strong choice if you know you will never bolt down. The difference is not quality, it is flexibility: the Explorer Bundle lets a buyer keep both options open rather than choosing a mounting philosophy before they have used the dish for a season.
Against a portable stand
A tripod mount kit is the better tool when the dish needs to sit away from the vehicle - on the ground, clear of shade or a canopy. The Explorer Bundle is vehicle-first. Plenty of buyers end up with both, because they solve different problems.
Buying the parts separately
You can assemble the same three items individually: the Universal Flat Mount, a power supply, and a carry bag. The bundle exists because buying them together costs less than buying them one at a time.
Where it works, and where it does not
Honest limits are more useful than a feature list.
- Magnets need steel. The magnetic feet hold on flat ferrous surfaces - a steel roof, canopy, toolbox or tray. An aluminium tray or canopy will not hold them, and no magnet will. Check the surface with a magnet before you buy if you are unsure.
- It is a flat mount. It wants a flat panel to sit on. A round rail, a bull bar or a curved roof line is a job for a rail or clamp mount instead, which is why the Setup Finder asks where you are mounting before it suggests anything.
- Starlink Mini only. This mount and its cover are sized for the Mini dish. Gen 3 and Gen 2 dishes use different mounts.
- Bolting needs tools. Removing the feet and bolting the frame down is a straightforward job, but it is still a job. Magnetic mounting needs no tools at all.
- One power supply per bundle. If you run two vehicles with different outlets, you need the second supply as well.
Setting it up
- Check the mounting surface. Flat, and steel if you are going magnetic.
- Decide the mode. Leave the rubber feet on for a removable mount, or remove them and bolt the frame down for a permanent one.
- Seat the Starlink Mini in the frame under the acrylic cover.
- Connect the power supply to your 12V outlet and to the dish.
- When you pack up, the dish, mount, supply and cables all go back in the bag in their own compartments.
The first setup is the slow one, because you are deciding the mode. After that it is a two-minute job at each stop.
Who it suits
- The touring 4WD owner who wants connectivity at camp without drilling the vehicle.
- The caravan or camper owner who moves the dish between the van and the tow vehicle.
- The tradie or service vehicle that wants a fixed install with a proper power feed and no loose gear in the tray.
- The first-time Starlink Mini buyer who does not yet know whether they will end up magnetic or bolted, and does not want to buy twice to find out.
Frequently asked questions
Does the Explorer Bundle Pack include the Starlink Mini dish?
No. The bundle contains the Universal Flat Mount, one 12V power supply and the padded carry bag. The dish is purchased separately.
Can I bolt it to an aluminium tray?
The magnets need a ferrous surface, so they will not hold on aluminium. Bolting is a different question: the frame fixes to the surface with hardware, so it depends on whether the tray or canopy can be drilled and fastened, not on what metal it is made of.
Will this mount fit a Starlink Gen 3 dish?
No. The frame and cover are sized for the Starlink Mini. Gen 2 and Gen 3 dishes use their own mount ranges.
Do I need an Anderson socket already installed?
Only if you choose the Anderson variant. That variant needs a 12V outlet with an Anderson plug connection. If you do not have one, choose the cigarette lighter variant instead, which uses the standard 12V socket in the vehicle.
Can I change my mind about magnetic versus bolted later?
Yes. The rubber feet are removable and replaceable. A magnetic setup can become a bolted one, and a bolted one can go back to magnetic.
Can I buy the parts separately?
Yes. The mount, both power supplies and the carry bag are all sold individually.
What to add later
Three additions make sense once the base kit is working. A silicone cable plug protection kit keeps dust and water out of the dish's cable connections on gravel and in weather. A hard protective travel case suits buyers who check the dish into a trailer or a toolbox rather than carrying it. And if the dish ever needs to sit away from the vehicle, the tripod mount kit covers that job.
None of those are needed on day one. The point of a starter kit is that it is complete enough to use and open enough to grow.
The short version
The Explorer Bundle Pack is the most versatile starting point in the Starlink Mini range because the mount refuses to pick a side. Magnetic feet for the vehicle that changes, bolts for the vehicle that does not, one power supply matched to the outlet you actually have, and a bag that keeps the whole thing together.
At $290 against $320 for the parts bought separately, it is also the cheapest way to start. Check the Explorer Bundle Pack for current stock, or use the Starlink Setup Finder if you are still deciding between a flat mount, a rail mount or a portable stand.




Leave a comment (all fields required)